The Javascript tool Master Slider is a 3rd party plugin fully integrated
into the J1 Theme by the module masterslider. J1 uses the free version
of Master Slider (MS Lite). The lite the version does not support all
features like slider layouts and no overlays are supported by the lite version.
| For all possible slider configurations, see Master Slider's official documentation to see a a full list of all slider options available. |
Read the following sections on using the module for your web pages.
Page configuration
The module masterslider is defined by resource record of type ondemand
and only available with a page if the module is explicitly requested.
---
title:                                  <your title>
tagline:                                <your tagline>
...
resources:                              [ masterslider ] (1)
resource_options:
  <your options>
---| 1 | The module masterslider needs to be given with the record resources
as the resource in only available on demand. |
Asciidoc Markup
J1 Theme provides an Asciidoc Extension masterslider:: to integrate
already configured MS sliders by an Asciidoc Markup into your web pages.
The extension is easy to use as only two parameters are required:
-
ms slider
ID -
additional
CSS classes(optional)
masterslider::slider_id[]
masterslider::slider_id[role="additional CSS classes"]
J1 Resource configuration
Find all resource settings in the Resource configuration
file ~/_data/resources.yml.
# ------------------------------------------------------------------------------
# MasterSlider, lite|free version 2.85.13 - Feb 2022
#
- name:                               Master Slider Lite
  resource:
    enabled:                          true
    id:                               masterslider
    comment:                          Module Master Slider Lite
    region:                           head
    layout:                           [ all ]
    required:                         ondemand
    preload:                          false
    script_load:                      sync
    dependencies:                     false
    pass_init_data:                   true
    data:
      css:                            [
                                        modules/masterslider/css/masterslider,
                                        modules/masterslider/css/theme/uno
                                      ]
      files:                          [ adapter/js/masterslider.js ]
      js:                             [
                                        modules/masterslider/js/plugins/jquery.easing,
                                        modules/masterslider/js/masterslider
                                      ]
      init_function:                  [ j1.adapter.masterslider.init ]
J1 Module configuration
Before MS sliders are used with your websites, all sliders must be set up
via the module’s user configuration. The sliders used can be configured
below the sliders key in the masterslider.yml configuration file located
in the folder ~/_data/modules.
# ------------------------------------------------------------------------------
# User settings
#
settings:
  # ----------------------------------------------------------------------------
  # Sliders
  # ----------------------------------------------------------------------------
  #
  sliders:
    # --------------------------------------------------------------------------
    # Slider 1, Simple Boxed
    #
    - slider:
      enabled:                          true
      id:                               ms_00001
      skin:                             light-3
      lightbox:
        enabled:                        true
        type:                           lb
      # ------------------------------------------------------------------------
      # Slider controls
      #
      controls:
        arrows:
          enabled:                      true
        bullets:
          enabled:                      true
      # ------------------------------------------------------------------------
      # Slider options
      #
      options:
        width:                          1200
        height:                         600
        applyFiltersAllSlides:          true
        filters:
          grayscale:                    0.5
          sepia:                        0.5
      # ------------------------------------------------------------------------
      # Slides
      #
      slides:
        # slide 1
        #
        - slide:
          alt:                          Cat 1
          title:                        Cat 1
          foreground_image:             /assets/image/module/masterslider/slider_1/cat-1.jpg
          background_image:             /assets/theme/j1/modules/masterslider/css/blank.gif
          thumb_image:                  false
          slideinfo:                    false
         ...
J1 Module initialization
After MS sliders are set up, the instances of the sliders needs to be
initialized* the make the ready to use. The J1 module masterslider
automatically generates an initializer script (the Slider Manager)
placed (dynamically) in the HTML source of a page before the closing
body tag (</body).
<script id="ms-slider-manager">
  $(function() {
  console.debug("initializing MS Slider Manager");
  var masterslider_1 = new MasterSlider();
  var masterslider_2 = new MasterSlider();
  var masterslider_3 = new MasterSlider();
  var masterslider_4 = new MasterSlider();
  ...
      masterslider_1.control(
        'arrows', {
          "autohide":false,
          "overVideo":true,
          "hideUnder":nul
      });
	    masterslider_1.control(
        'bullets', {
          "autohide":false,
          "overVideo":true,
          "dir":"h",
          "hideUnder":null,
          "align":"bottom",
          "margin":10
      });
	    masterslider_3.control(
        'slideinfo', {
          "autohide":false,
          "overVideo":true,
          "insertTo":"",
          "size":100,
          "hideUnder":null,
          "align":"bottom",
          "inset":false,
          "margin":-133
      });
	    masterslider_4.control(
        'bullets', {
          "autohide":false,
          "overVideo":true,
          "dir":"h",
          "hideUnder":null,
          "align":"bottom",
          "margin":10
      });
	    masterslider_4.control(
        'thumblist', {
          "width":100,
          "height":80,
          "autohide":false,
          "overVideo":true,
          "dir":"v",
          "speed":17,
          "hideUnder":null,
          "inset":false,
          "arrows":false,
          "hover":false,
          "customClass":"",
          "align":"right",
          "type":"thumbs",
          "margin":1,
          "space":1,
          "fillMode":"fill"
      });
	    masterslider_4.control(
        'scrollbar', {
          "autohide":false,
          "overVideo":true,
          "dir":"h",
          "inset":true,
          "align":"top",
          "color":"#404040",
          "hideUnder":null,
          "margin":10,
          "width":4
      });
      ...
	    masterslider_4.setup(
        'ms_00004', {
          "width":1200,
          "height":600,
          "minHeight":0,
          "space":0,
          "start":1,
          "grabCursor":true,
          "swipe":true,
          "mouse":true,
          "keyboard":false,
          "layout":"boxed",
          "wheel":false,
          "autoplay":false,
          "instantStartLayers":false,
          "mobileBGVideo":false,
          "loop":false,
          "shuffle":false,
          "preload":0,
          "heightLimit":true,
          "autoHeight":false,
          "smoothHeight":true,
          "endPause":false,
          "overPause":true,
          "fillMode":"fill",
          "centerControls":true,
          "startOnAppear":false,
          "layersMode":"center",
          "autofillTarget":"",
          "hideLayers":false,
          "fullscreenMargin":0,
          "speed":20,
          "dir":"h",
          "responsive":true,
          "tabletWidth":768,
          "tabletHeight":null,
          "phoneWidth":480,
          "phoneHeight":null,
          "sizingReference":"window",
          "parallaxMode":"mouse",
          "filters":null,
          "view":"basic"
      });
	    j1.masterslider.instances.push(masterslider_4);
      ...
  console.debug("initializing MS Slider Manager finished");
  });
</script>
Example Slider
This MS Slider is using a quite simple configuration. This config is a good base to try out other configuration features provided by MS Lite. Additionally, this MS Slider is using the (CSS) filter feature of Master Slider. Filters can be used for example to transform the style of the images provided by a MS Slider. In this example, the MS Slider images are transformed from style color to sepia.
| Lightbox support is only available for J1 Theme. The product version MS Lite and MS Pro does not support Lightboxes on sliders out-of-the-box. |
| Click on the Lightbox symbol in the slides to see the base colored images. |
Slider 1 is using the following general settings:
| Setting | Value | Description |
|---|---|---|
|
skin |
|
Skins control the design for the base UI elements |
|
layout |
|
The MS Slider width and height is defined by the slider options |
|
lightbox |
|
Type of the lightbox |
|
controls |
|
Default settings. The settngs are defined in |
|
controls |
|
Default settings. The settngs are defined in |
|
filters |
|
value: 0.5 |
|
filters |
|
value: 0.5 |
| Do not use the identical slider ids on the same page. Duplicate ids on the same page will cause the module initialization to fail and result in no sliders being usable. |
MS Slider settings
For the standard version of MS Lite, no filters are supported. J1 Theme is using a extended version of MS Lite to support (CSS) filters for your silders.
|
The property For default, filters are applied to all (background) images of a MS Slider
except the active (visible/selected) slide. If |
Find the full MS Slider settings in the Master Slider configuration
file ~/_data/masterslider.yml.
|
  # ----------------------------------------------------------------------------
  # Sliders
  # ----------------------------------------------------------------------------
  #
  sliders:
    # --------------------------------------------------------------------------
    # Slider 1, Simple Boxed
    #
    - slider:
      enabled:                          true
      id:                               ms_00001
      skin:                             light-3
      lightbox:
        enabled:                        true
        type:                           lb
      # ------------------------------------------------------------------------
      # Slider controls
      #
      controls:
        arrows:
          enabled:                      true
        bullets:
          enabled:                      true
      # ------------------------------------------------------------------------
      # Slider options
      #
      options:
        width:                          1200
        height:                         600
        applyFiltersAllSlides:          true
        filters:
          grayscale:                    0.5
          sepia:                        0.5
      # ------------------------------------------------------------------------
      # Slides
      #
      slides:
        # slide 1
        #
        - slide:
          alt:                          Cat 1
          title:                        Cat 1
          foreground_image:             /assets/image/module/masterslider/slider_1/cat-1.jpg
          background_image:             /assets/theme/j1/modules/masterslider/css/blank.gif
          thumb_image:                  false
          slideinfo:                    false
        # slide 2
        #
        - slide:
          alt:                          Cat 2
          title:                        Cat 2
          foreground_image:             /assets/image/module/masterslider/slider_1/cat-2.jpg
          background_image:             /assets/theme/j1/modules/masterslider/css/blank.gif
          thumb_image:                  false
          slideinfo:                    false
        # slide 3
        #
        - slide:
          alt:                          Cat 3
          title:                        Cat 3
          foreground_image:             /assets/image/module/masterslider/slider_1/cat-3.jpg
          background_image:             /assets/theme/j1/modules/masterslider/css/blank.gif
          thumb_image:                  false
          slideinfo:                    false
Asciidoc Markup
To place a MS Slider in your Asciidoc-based sources, the use of the Asciidoc
extension masterslider:: is recommended.
masterslider::ms_00001[role="mt-4 mb-5"]HTML Markup
MS sliders are based on so-called templates. A template defines the HTML
portion, the base HTML structure of a slider in a webpage. The J1 module
masterslider is fully configurable. Based on the J1 configuration of an
MS slider, the template is automatically generated and loaded as required - no
need for any programming or writing HTML code for your MS sliders.
Find the automatically generated template (HTML code) for slider ms_00001
below.
ms_00001
<div id="p_ms_00001" class="master-slider-parent mt-4 mb-5">
  <div id="ms_00001" class="master-slider ms-skin-light-3">
    <div id="lightgallery_ms_00001" class="lightgallery-container" style="display: none;">
      <img id="ms_00001_1" src="/assets/image/module/masterslider/slider_1/cat-1.jpg" alt="Cat 1" title="Cat 1">
      <img id="ms_00001_2" src="/assets/image/module/masterslider/slider_1/cat-2.jpg" alt="Cat 2" title="Cat 2">
      <img id="ms_00001_3" src="/assets/image/module/masterslider/slider_1/cat-3.jpg" alt="Cat 3" title="Cat 3">
    </div>
    <div id="ms-slide-ms_00001-1" class="ms-slide ms-slide-ms_00001">
      <img class="ms_00001-lg-item"
        src="/assets/theme/j1/modules/masterslider/css/blank.gif"
        alt="Cat 1" title="Cat 1"
        data-src="/assets/image/module/masterslider/slider_1/cat-1.jpg"
      />
    </div>
    <div id="ms-slide-ms_00001-2" class="ms-slide ms-slide-ms_00001">
      <img class="ms_00001-lg-item"
        src="/assets/theme/j1/modules/masterslider/css/blank.gif"
        alt="Cat 2" title="Cat 2"
        data-src="/assets/image/module/masterslider/slider_1/cat-2.jpg"
      />
    </div>
    <div id="ms-slide-ms_00001-3" class="ms-slide ms-slide-ms_00001">
      <img class="ms_00001-lg-item"
        src="/assets/theme/j1/modules/masterslider/css/blank.gif"
        alt="Cat 3" title="Cat 3"
        data-src="/assets/image/module/masterslider/slider_1/cat-3.jpg"
      />
    </div>
  </div>
</div>
JS Initialisation
Based on the J1 configuration of an MS slider, the Javascript Initializer for
the template is automatically generated and loaded as required by the J1 module
masterslider. Again, no need for any programming or writing code for your
MS sliders.
Find the automatically generated Javascript Initializer for the slider
ms_00001 below.
ms_00001
var masterslider_1 = new MasterSlider();
// generated slider control settings
masterslider_1.control(
    'arrows', {
    "autohide": false,
    "overVideo": true,
    "hideUnder": null
});
masterslider_1.control(
  'bullets', {
    "autohide": false,
    "overVideo": true,
    "dir": "h",
    "hideUnder": null,
    "align": "bottom",
    "margin": 10
});
// generated slider setup settings
masterslider_1.setup(
  'ms_00001', {
    "width": 1200,
    "height": 600,
    "minHeight": 0,
    "space": 0,
    "start": 1,
    "grabCursor": true,
    "swipe": true,
    "mouse": true,
    "keyboard": false,
    "layout": "boxed",
    "wheel": false,
    "autoplay": false,
    "instantStartLayers": false,
    "mobileBGVideo": false,
    "loop": false,
    "shuffle": false,
    "preload": 0,
    "heightLimit": true,
    "autoHeight": false,
    "smoothHeight": true,
    "endPause": false,
    "overPause": true,
    "fillMode": "fill",
    "centerControls": true,
    "startOnAppear": false,
    "layersMode": "center",
    "autofillTarget": "",
    "hideLayers": false,
    "fullscreenMargin": 0,
    "speed": 20,
    "dir": "h",
    "responsive": true,
    "tabletWidth": 768,
    "tabletHeight": null,
    "phoneWidth": 480,
    "phoneHeight": null,
    "sizingReference": "window",
    "parallaxMode": "mouse",
    "filters": {
      "grayscale": 0.5,
      "sepia": 0.5
    },
    "view": "basic",
    "applyFiltersAllSlides": true
});
// save slider config for later access
j1.masterslider.instances.push(masterslider_1);
Rendered Slider
See the rendered slider below (id: ms_00001) based on the Asciidoc Markup
using the extension masterslider::.
MS Slider properties
Find below all available property settings for MS Sliders and their UI elements (controls).
Slider Options
You can use/change following options in slider setup method. For example:
<script>
    var slider = new MasterSlider();
    slider.setup('masterslider' , {
      width:800,    // slider standard width
      height:350,   // slider standard height
      space:5,
      fullwidth:true,
      autoHeight:true,
      view:"mask"
      // more slider options goes here...
  });
</script>| Option | Default Value | Description | ||
|---|---|---|---|---|
|
|
300 |
The base width of slides. It helps the slider to resize in correct. ratio. |
||
|
|
150 |
The base height of slides, It helps the slider to resize in correct ratio. |
||
|
|
1 |
The slider starting slide number. |
||
|
|
0 |
The spacing value between slides in pixels. |
||
|
|
true |
Whether the slider uses grab mouse cursor. |
||
|
|
true |
Whether the drag/swipe navigation is enabled. |
||
|
|
true |
Whether the user can use mouse drag navigation. |
||
|
|
false |
Enables mouse scroll wheel navigation. |
||
|
|
false |
Enables keyboard navigation. |
||
|
|
false |
Enables the autoplay slideshow. |
||
|
|
false |
Enables the continuous sliding mode. |
||
|
|
false |
Enables the shuffle slide order. |
||
|
|
0 |
Specifies number of slides which will be loaded by slider. 0 value means slider will load slides in sequence and "all" value means slider will load all of the slides at starting. This option is only effective for images which has "data-src" attribute. |
||
|
|
boxed |
Specifies layout of the slider, it accepts following values:
|
||
|
|
0 |
Specifies margin space at the bottom of slider, it only affects with
|
||
|
|
false |
It force the slide to use max height value as its base specified height value. |
||
|
|
false |
Whether the slider adapts its height to each slide height or not. It
overrides |
||
|
|
true |
Whether the slider uses smooth animation while its height changes. |
||
|
|
false |
Whether the slider pauses slideshow when it reaches to last slide. |
||
|
|
false |
Whether the slider pauses slideshow on hover. |
||
|
|
fill |
Specifies the slide background scaling method. Its acceptable values are
|
||
|
|
true |
Whether the slider aligns UI controls to center. This option is only effective in full width mode. |
||
|
|
center |
It accepts two values |
||
|
|
false |
Whether start show transition of layers before slide transition complete. |
||
|
|
mouse |
Specifies type of layers parallax move, it accepts below values:
|
||
|
|
null |
Applys (CSS3) filters to slide transition views. For more information check Adding CSS3 filters. Available filters:
|
||
|
|
false |
Filters are applied to all (background) images of a slider except the
active (visible/selected) slide on position 0. If applyFiltersAllSlides is
set to
|
||
|
|
false |
Transforms a slider (background images) in a duo-color style.
|
||
|
|
false |
Whether the slider hides all layers before changing slide |
||
|
|
17 |
Specifies slide changing speed. It accepts float values between 0 and 100. |
||
|
|
h |
Specifies slide changing direction. It accepts two values |
||
|
|
basic |
The slide changing transition. Available settings are:
|
||
|
|
null |
A unique name for the slider which will be used in browser address bar you can enter your own name otherwise slider generates a unique one. |
||
|
|
path |
Specifies the type of displaying slider deeplinking permalink in the
address bar. Acceptable values: |
||
|
|
false |
It initializes slider when slider comes inside of browser window when scrolling. |
Slider Controls
You can use/change following options in slider control method.
For example:
<script>
var slider = new MasterSlider();
slider.setup('masterslider' , {
width:800, // slider standard width
height:350, // slider standard height
space:5,
fullwidth:true,
autoHeight:true,
view:"mask"
// more slider options goes here...
});
// Added arrow control (default settings) to the slider
slider.control('arrows');
// Added bullets control to the slider
slider.control(
'bullets', {
"autohide": false,
"overVideo": true,
"dir": "h",
"hideUnder": null,
"align": "bottom",
"margin": 10
});
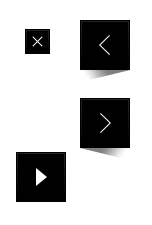
</script>Arrows
Adds arrow navigation to the slider (CSS class names: ms-nav-next and
ms-nav-prev).
| Name | Default Value | Description |
|---|---|---|
|
|
true |
Whether the control hides when mouse leaves the slider. |
|
|
true |
Whether the control visible over slide video while. playing. |
|
|
null |
Hides the control if width of slider comes less than specified. |
  var slider = new MasterSlider();
  slider.setup(
    'masterslider', {
      width:800, height:350
  });
  slider.control(
    'arrows', {
      autohide:false
  });
Bullets
This UI control adds one bullet for each slide and user can change slide
by clicking on each bullet (CSS class name: ms-bullets).
| Name | Default Value | Description |
|---|---|---|
|
|
true |
Whether the control hides when mouse leaves the slider. |
|
|
true |
Whether the control visible over slide video while playing. |
|
|
h |
Specifies the direction of control. It accepts two values |
|
|
null |
Hides the control if width of slider comes less than specified. |
|
|
bottom |
Aligns the control to in or out of slider. It accepts
|
|
|
10 |
Specifies the space between the control and slider in pixel. |
  var slider = new MasterSlider();
  slider.setup(
    'masterslider', {
      width:800, height:350
  });
  slider.control(
    'bullets', {
      autohide:false,
      dir:"v",
      align:"top"
  });
Thumblist
This control searches for an element which has ms-thumb as class name
in slider html then creates a list of thumbnails (CSS class name:
ms-thumb-list).
You can create a div element with ms-thumb class name in each
slide and use html instead of image in thumbnail list. Like following:
|
  <!-- new slide -->
  <div class="ms-slide">
    <!-- slide background -->
    <img src="masterslider/blank.gif" data-src="masterslider/images/3.jpg" alt="lorem ipsum dolor sit"/>
    <!-- slide text title it shows in thumbnail list. -->
    <div class="ms-thumb"Lorem ipsum dolore</div>
  </div>
<!-- end of slide -->| Name | Default Value | Description |
|---|---|---|
|
|
true |
Whether the control hides when mouse leaves the slider. |
|
|
true |
Whether the control visible over slide video while playing. |
|
|
100 |
Specifies the width of each thumb in pixel. |
|
|
100 |
Specifies the height of each thumb in pixel. |
|
|
thumbs |
Specifies the type of control, it can used as |
|
|
h |
Specifies the direction of control. It accepts two values |
|
|
17 |
Specifies scrolling speed. It accepts float values between 0 and 100. |
|
|
null |
Hides the control if width of slider comes less than specified. |
|
|
bottom |
Aligns the control to in or out of slider. It accepts
|
|
|
false |
Whether change slides on hovering over thumbs. |
|
|
false |
Whether add arrows in thumblist. |
|
|
false |
Whether insert the control inside or outside of slider. |
|
|
10 |
Specifies the space between the control and slider in pixel. |
|
|
10 |
Specifies the space between thumbs or tabs. |
  var slider = new MasterSlider();
  slider.setup(
    'masterslider', {
      width:800,
      height:350
  });
  slider.control('bullets');
  slider.control(
    'thumblist', {
      autohide:false,
      dir:"v"
  });
Scrollbar
This UI control adds a scroll bar in slider which moves when each slide
changes (CSS class name: ms-sbar).
| Name | Default Value | Description |
|---|---|---|
|
|
true |
Whether the control hides when mouse leaves the slider. |
|
|
true |
Whether the control visible over slide video while playing |
|
|
h |
Specifies the direction of control. It accepts two values |
|
|
"#3D3D3D" |
Specifies the color scrollbar handle color. |
|
|
4 |
Specifies the width of scrollbar handle in pixel |
|
|
null |
Hides the control if width of slider comes less than specified |
|
|
bottom |
Aligns the control to in or out of slider. It accepts
|
|
|
false |
Whether insert the control inside or outside of slider |
|
|
10 |
Specifies the space between the control and slider in pixel |
  var slider = new MasterSlider();
  slider.setup(
    'masterslider', {
      width:800, height:350
  });
  slider.control(
    'thumblist', {
      autohide:false,
      dir:"v"
    });
  slider.control(
    'scrollbar', {
      dir:"v"
  });
CircleTimer
It adds a circle timer into slider. This control only works in modern
browsers (CSS class name: ms-ctimer).
| Name | Default Value | Description |
|---|---|---|
|
|
true |
Whether the control hides when mouse leaves the slider. |
|
|
true |
Whether the control visible over slide video while playing. |
|
|
"#A2A2A2" |
Specifies the color of circle timer. |
|
|
4 |
Specifies the radius of circle timer in pixels. |
|
|
10 |
Specifies the stroke of circle timer in pixels. |
|
|
null |
Hides the control if width of slider comes less than specified. |
  var slider = new MasterSlider();
  slider.setup(
    'masterslider', {
      width:800,
      height:350
  });
  slider.control(
    'thumblist', {
      autohide:false,
      dir:"v"
  });
  slider.control(
    'circletimer', {
      color:"#FFDD00",
      stroke:20
  });
Timebar
It adds a progress bar for timer in slider (CSS class name: ms-timerbar).
| Name | Default Value | Description |
|---|---|---|
|
|
true |
Whether the control hides when mouse leaves the slider. |
|
|
true |
Whether the control visible over slide video while playing. |
|
|
"#FFFFFF" |
Specifies the color of timebar. |
|
|
null |
Hides the control if width of slider comes less than specified. |
|
|
bottom |
Aligns the control to in or out of slider. It accepts
|
|
|
false |
Whether insert the control inside or outside of slider. |
|
|
0 |
Specifies the space between the control and slider in pixel. |
  var slider = new MasterSlider();
  slider.setup(
    'masterslider', {
      width:800,
      height:350
  });
  slider.control('timebar');
SlideInfo
With this control you can specify a HTML value to each slide and slider
will show the value of slide while it selected. This control searches for
an element which has ms-info as class name in each slide.
| Name | Default Value | Description |
|---|---|---|
|
|
true |
Whether the control hides when mouse leaves the slider. |
|
|
true |
Whether the control visible over slide video while playing. |
|
|
- |
The HTML element that the info will be added in it. |
|
|
100 |
Specifies the width or height (based on specified direction) of slide info container in pixel. |
|
|
null |
Hides the control if width of slider comes less than specified. |
|
|
bottom |
Aligns the control to in or out of slider. It accepts
|
|
|
false |
Whether insert the control inside or outside of slider. |
|
|
10 |
Specifies the space between the control and slider in pixel. |
  var slider = new MasterSlider();
  slider.setup(
    'masterslider', {
      width:800,
      height:350
  });
  slider.control(
    'slideinfo', {
      insertTo:'#info'
  });
MS Slider API
Eum aut eius repudiandae et corrupti molestiae est non est quisquam est et est nesciunt. Eaque qui minus laboriosam iure molestiae necessitatibus molestiae quidem. Et id est porro animi eum ut vitae neque reprehenderit mollitia harum quam error provident.
Methods
Sit aut in non laboriosam facilis molestias quis architecto optio perspiciatis. Expedita culpa dicta autem provident dolorem nisi architecto quisquam perspiciatis inventore praesentium nostrum quia est. Quas vero et totam ullam illo maiores cumque maxime sed eum quia non.
  var slider = new MasterSlider();
  slider.setup('masterslider' , {width:800, height:350});
  slider.api.index();           // returns current slider index.
  slider.api.count();           // returns total number of slides.
  slider.api.next();            // next slide.
  slider.api.previous();        // previous slide.
  slider.api.gotoSlide(4);      // moves to 4th slide.
  slider.api.pause();           // pauses the slider timer.
  slider.api.resume();          // resumes the slider timer.
  slider.api.currentTime();     // returns the percentage of elapsed time.
  slider.api.destroy();         // removes the slider.
Properties
Temporibus et dolorum sed odit deleniti quia ab enim excepturi possimus atque. Distinctio natus rerum nisi culpa ratione assumenda amet sunt qui reprehenderit doloremque magnam. Sit ad culpa aliquid voluptas asperiores provident quibusdam est veniam incidunt dolor dolor sed ratione.
  slider.api.so                 // returns the object of slider options.
  slider.api.view               // returns the slider transition object.
  slider.api.view.slideList     // returns a array of all slides.
  slider.api.viwe.currentSlide  // returns the current slide object.
Events
Eum voluptatibus dolorem quia aut labore et quidem dolorum sed iste ullam rerum sed. Quia quia enim ut iure quos quia. Sunt asperiores minus molestiae cupiditate sapiente eos.
  slider.api.addEventListener(MSSliderEvent.INIT , function() {
    // dispatches when the slider's current slide change starts.
  });
  slider.api.addEventListener(MSSliderEvent.CHANGE_START , function() {
    // dispatches when the slider's current slide change starts.
  });
  slider.api.addEventListener(MSSliderEvent.CHANGE_END , function() {
    // dispatches when the slider's current slide change ends.
  });
  slider.api.addEventListener(MSSliderEvent.WAITING , function() {
    // dispatches whenever the slider timer updates.
  });
  slider.api.addEventListener(MSSliderEvent.RESIZE , function() {
    // dispatches when the slider is resized.
  });
  slider.api.addEventListener(MSSliderEvent.VIDEO_PLAY , function() {
    // dispatches when the slide video played.
  });
  slider.api.addEventListener(MSSliderEvent.VIDEO_CLOSE , function() {
    // dispatches when the slide video closed.
  });
  slider.api.view.addEventListener(MSViewEvents.SWIPE_START , function() {
    // dispatches when swipe dragging starts.
  });
  slider.api.view.addEventListener(MSViewEvents.SWIPE_END , function() {
    // dispatches when swipe dragging ends.
  });
  slider.api.view.addEventListener(MSViewEvents.SWIPE_MOVE , function() {
    // dispatches when swipe dragging moves.
  });
  slider.api.view.addEventListener(MSViewEvents.SWIPE_CANCEL , function() {
    // dispatches when swipe dragging cancels.
  });
MS Slider Skins
Here you can find a list of available skins which included in dowload package.
You can change the slider skin by following these steps:
-
Find and upload your preferred skin from "skins" folder.
-
Import "style.css" from the skin folder into your page like following:
<link rel="stylesheet" href="masterslider/skins/light-2/style.css" />Specify skin class name to your slider element.
  <!-- masterslider -->
  <div class="master-slider ms-skin-light-2" id="masterslider">
    <!-- slides goes here -->
  </div>
<!-- end of masterslider -->| Control Elements | Name | Class Name |
|---|---|---|
|
|
default |
ms-skin-default |
|
|
Light 2 |
ms-skin-light-2 |
|
|
Light 3 |
ms-skin-light-3 |
|
|
Light 4 |
ms-skin-light-4 |
|
|
Light 5 |
ms-skin-light-5 |
|
|
Light 6 |
ms-skin-light-6 |
|
|
Contrast |
ms-skin-contrast |
|
|
Black 1 |
ms-skin-black-1 |
|
|
Black 2 |
ms-skin-black-2 |
|
|
Metro |
ms-skin-metro |


CSS3 Filter Functions
The filter property is specified as none or one or more of the functions listed below. If the parameter for any function is invalid, the function returns none. Except where noted, the functions that take a value expressed with a percent sign (as in 34%) also accept the value expressed as decimal (as in 0.34).
blur()
The blur() function applies a Gaussian blur to the input image. The value of radius defines the value of the standard deviation to the Gaussian function, or how many pixels on the screen blend into each other, so a larger value will create more blur. The initial value for interpolation is 0. The parameter is specified as a CSS length, but does not accept percentage values.
filter: blur(5)
filter: blur(50)
brightness()
The brightness() function applies a linear multiplier to the input image, making it appear more or less bright. A value of 0% will create an image that is completely black. A value of 100% leaves the input unchanged. Other values are linear multipliers on the effect. Values of an amount over 100% are allowed, providing brighter results. The initial value for interpolation is 1.
filter: brightness(1)
filter: brightness(0.3)
contrast()
The contrast() function adjusts the contrast of the input image. A value of 0% will create an image that is completely gray. A value of 100% leaves the input unchanged. Values of an amount over 100% are allowed, providing results with more contrast. The initial value for interpolation is 1.
filter: contrast(2)grayscale()
The grayscale() function converts the input image to grayscale. The value of amount defines the proportion of the conversion. A value of 100% is completely grayscale. A value of 0% leaves the input unchanged. Values between 0% and 100% are linear multipliers on the effect. The initial value for interpolation is 0.
filter: grayscale(1)
filter: grayscale(0.5)
hue-rotate()
The hue-rotate() function applies a hue rotation on the input image. The value of angle defines the number of degrees around the color circle the input samples will be adjusted. A value of 0deg leaves the input unchanged. The initial value for interpolation is 0. Though there is no maximum value; the effect of values above 360deg wraps around.
filter: hue-rotate(90)invert()
The invert() function inverts the samples in the input image. The value of amount defines the proportion of the conversion. A value of 100% is completely inverted. A value of 0% leaves the input unchanged. Values between 0% and 100% are linear multipliers on the effect. The initial value for interpolation is 0.
filter: invert(100%)
filter: invert(1)
filter: invert(0.6)
opacity()
The opacity() function applies transparency to the samples in the input image. The value of amount defines the proportion of the conversion. A value of 0% is completely transparent. A value of 100% leaves the input unchanged. Values between 0% and 100% are linear multipliers on the effect. This is equivalent to multiplying the input image samples by amount. The initial value for interpolation is 1. This function is similar to the more established opacity property; the difference is that with filters, some browsers provide hardware acceleration for better performance.
filter: opacity(1)
filter: opacity(0.5)
saturate()
The saturate() function saturates the input image. The value of amount defines the proportion of the conversion. A value of 0% is completely un-saturated. A value of 100% leaves the input unchanged. Other values are linear multipliers on the effect. Values of amount over 100% are allowed, providing super-saturated results. The initial value for interpolation is 1.
filter: saturate(200%)sepia()
The sepia() function converts the input image to sepia. The value of amount defines the proportion of the conversion. A value of 100% is completely sepia. A value of 0% leaves the input unchanged. Values between 0% and 100% are linear multipliers on the effect. The initial value for interpolation is 0.
filter: sepia(1)
filter: sepia(0.5)
Combining functions
You may combine any number of functions to manipulate the rendering. The following example enhances the contrast and brightness of the image:
filter: grayscale(0.5) sepia(0.5)